

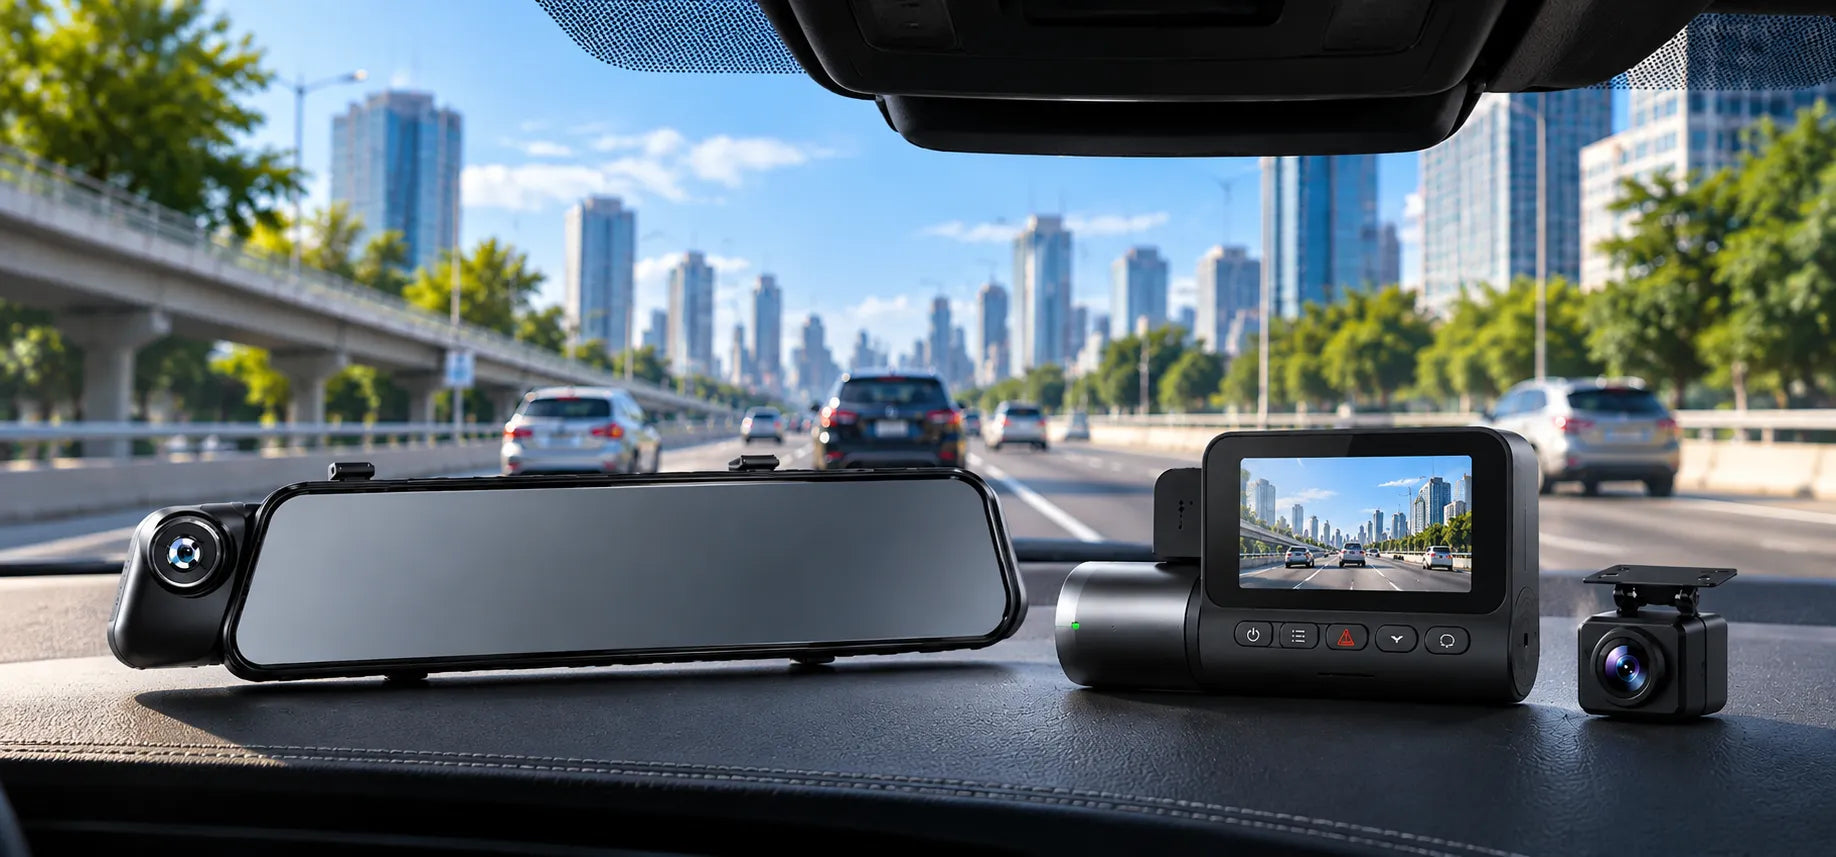
Driving in the Philippines can be unpredictable. From sudden lane changes and heavy traffic to tight parking spaces and incidents on the road, having a dash cam can provide useful video evidence when you need it most.
But not all dash cams offer the same level of coverage. A 2-channel dash cam records the road ahead and behind your vehicle, while a 3-channel dash cam adds a cabin camera for interior coverage. The right choice depends on how you drive, who uses your vehicle, and how much coverage you need.
In this guide, we'll compare 2-channel vs. 3-channel dash cams, explain the advantages of each setup, and compare the Occulli S1 and Occulli X1 to help you choose the right dash cam for your needs.
- What is a 2-channel dash cam?
- What is a 3-channel dash cam?
- 2-channel vs. 3-channel: what's the difference?
- Why front and rear coverage matters
- Why would you need a cabin camera?
- Which dash cam is right for you?
- Occulli S1 vs. Occulli X1
- Dash cam installation
- Frequently asked questions
- Quick Summary
- Why Occulli?
What Is a 2-Channel Dash Cam?
A 2-channel dash cam uses two cameras to record your vehicle's surroundings:
- Front camera – records the road ahead
- Rear camera – records what happens behind your vehicle
This setup provides more complete coverage than a front-only dash cam without adding an interior camera. For most private vehicle owners, a 2-channel dash cam offers a practical balance between coverage, convenience, and cost.
Who is a 2-channel dash cam best for?
A 2-channel dash cam is ideal for:
- Private car owners
- Daily commuters
- New car owners
- Delivery drivers
- Drivers who mainly need road-facing coverage
- Anyone who wants front and rear protection without a cabin camera
If your main concern is documenting traffic incidents, rear-end collisions, sudden lane changes, or other road situations, a 2-channel system may provide all the coverage you need.
What Is a 3-Channel Dash Cam?
A 3-channel dash cam records from three different perspectives:
- Front camera – records the road ahead
- Rear camera – records the area behind your vehicle
- Cabin camera – records the vehicle's interior
The additional cabin camera can be particularly useful when passengers, employees, customers, or other occupants regularly use the vehicle.
Who is a 3-channel dash cam best for?
A 3-channel dash cam is especially useful for:
- Grab and ride-hailing drivers
- Taxi drivers
- PUV operators
- Fleet and company vehicles
- Professional drivers
- Long-distance drivers
- Families who frequently travel with passengers
If you need both road and interior coverage, a 3-channel setup provides a more comprehensive recording system.
2-Channel vs. 3-Channel Dash Cam: What's the Difference?

The main difference is simple: a 2-channel dash cam records the front and rear, while a 3-channel dash cam adds interior coverage.
| Feature | 2-Channel Dash Cam | 3-Channel Dash Cam |
|---|---|---|
| Front recording | Yes | Yes |
| Rear recording | Yes | Yes |
| Cabin recording | No | Yes |
| Road coverage | Front + rear | Front + rear |
| Interior coverage | No | Yes |
| Best for | Private vehicles and daily driving | Ride-hailing, PUV, fleet, and passenger use |
| Overall coverage | Road-focused | Road + cabin |
Which one should you choose?
Choose a 2-channel dash cam if you primarily want front and rear road coverage. Choose a 3-channel dash cam if you also need to record what happens inside the vehicle. The extra camera is most valuable when passengers, customers, or employees are regularly inside the vehicle.

Why Front and Rear Coverage Matters
A front camera is useful for documenting what happens in front of your vehicle, but incidents do not always happen in your field of view. Rear-end collisions, sudden braking, aggressive driving, and vehicles approaching from behind can all happen outside the front camera's coverage.
That's why a front-and-rear setup can provide more complete evidence of what happened before, during, and after an incident. For Filipino drivers who regularly deal with heavy traffic and busy roads, having both perspectives can be a practical upgrade from a front-only dash cam.
Why Would You Need a Cabin Camera?
The cabin camera adds another layer of visibility by recording the vehicle's interior. This can be particularly useful for drivers who regularly carry passengers or operate a vehicle for work.
For example, ride-hailing and taxi drivers may benefit from having a record of activity inside the vehicle. Fleet operators can also use interior footage as an additional layer of accountability.
A cabin camera may be less important for someone who primarily drives a private vehicle alone. In other words, the decision between 2-channel and 3-channel coverage should depend not only on how much road coverage you want, but also on who uses your vehicle.
Which Dash Cam Is Right for You?
Your driving situation is one of the easiest ways to decide between a 2-channel and 3-channel setup.
| Driver Type | Recommended Setup | Why |
|---|---|---|
| Private car owner | 2-channel | Front and rear coverage is usually sufficient |
| Daily commuter | 2-channel | Practical coverage for everyday road use |
| Delivery driver | 2-channel | Focuses on road incidents and rear coverage |
| Grab / ride-hailing driver | 3-channel | Adds interior passenger coverage |
| Taxi driver | 3-channel | Records both road and cabin activity |
| PUV driver | 3-channel | Useful for passenger-facing coverage |
| Fleet/company vehicle | 3-channel | Adds an additional layer of visibility |
| Family vehicle with frequent passengers | 3-channel | Provides interior coverage |
| Professional/long-distance driver | 3-channel | More comprehensive road and cabin coverage |
If you mainly want protection while driving your own vehicle, a 2-channel system is often the more practical choice. If your vehicle regularly carries passengers or is used professionally, a 3-channel system can provide additional coverage that a standard front-and-rear setup cannot.
Occulli S1 vs. Occulli X1
The Occulli S1 and Occulli X1 are designed for different driving needs.
| Feature | Occulli S1 | Occulli X1 |
|---|---|---|
| Camera setup | 2-channel | 3-channel |
| Front camera | 4K interpolated | 4K standard / 2K with ADAS |
| Rear camera | 2K interpolated | 2K |
| Cabin camera | — | 1K |
| Front viewing angle | 170° | 170° |
| Display | — | 9.66" IPS touchscreen mirror |
| ADAS | — | Yes |
| Blind spot detection | — | Yes |
| Lane change assist | — | Yes |
| Low-light recording | — | Yes |
| G-Sensor | Yes | Yes |
| Loop recording | Yes | Yes |
| Built-in microphone | Yes | Yes |
| Recommended microSD | Class 10+ | UHS U3+ |
| Internal battery | No | No |
Important: The Occulli X1's front camera records at 2K when ADAS is enabled. In standard operation, it can record at 4K.

Occulli S1: Best for Everyday Front and Rear Coverage
The Occulli S1 is a practical choice for drivers who want front and rear recording without adding a cabin camera. Its 2-channel setup makes it well suited for private vehicles, daily commuters, delivery drivers, and other drivers whose main priority is road coverage.
If you rarely carry passengers and mainly want a straightforward front-and-rear dash cam, the S1 provides a focused setup without unnecessary additional coverage.
Choose the Occulli S1 if: you want reliable front and rear coverage for everyday driving.

Occulli X1: Best for Front, Rear, and Cabin Coverage
The Occulli X1 is designed for drivers who need more comprehensive coverage. Its 3-channel setup records the road ahead, the area behind the vehicle, and the cabin. This makes it particularly useful for ride-hailing drivers, taxi operators, PUV drivers, fleet vehicles, and other professional applications.
The X1 also adds features such as ADAS, blind spot detection, lane change assist, and a large IPS touchscreen mirror.
Choose the Occulli X1 if: you regularly carry passengers or want road and interior coverage in one system.
Dash Cam Installation
A properly installed dash cam should provide a clear view without unnecessarily obstructing the driver's visibility. Steps differ slightly between the S1 (windshield-mounted camera) and the X1 (mirror-mounted unit).
Occulli S1 Installation Guide
Prepare the Camera
- Insert the microSD card before powering on
- Test-fit the camera location
- Clean the windshield with an alcohol wipe
Mount the Front Camera
- Position behind the rearview mirror
- Peel and apply the adhesive mount
- Hold firmly for 30 seconds
- Adjust the camera level with the road
Connect Power Cable
- Plug the power cable into the camera
- Route the cable along the windshield headliner
- Tuck it behind the A-pillar trim
- Connect to the 12V cigarette lighter
Install Rear Camera
- Route the rear camera cable along the headliner
- Continue down the C-pillar to the trunk
- Pass the cable through the trunk rubber grommet
- Mount the rear camera above or beside the license plate
- Connect the cable to the front camera
Test System
- Start the vehicle
- Confirm automatic recording
- Verify both front and rear camera views
- Adjust camera angles if necessary
Finalize Installation
- Secure loose cables with clips or zip ties
- Leave slight cable slack near both cameras
- Reinstall trim panels
- Confirm all recordings are working properly
Occulli X1 Installation Guide
Prepare the Camera
- Insert the microSD card before powering on
- Clean the factory rearview mirror with a microfiber cloth
- Ensure the mirror is free from dust, fingerprints, or debris
Mount the Front Camera/Screen
- Open the mounting straps/clips on the back of the X1
- Hook the straps over the top and bottom of the factory mirror
- Ensure the X1 sits flush and is securely fastened
- Confirm the display does not block the driver's view or any factory sensors
Connect Power Cable
- Plug the power cable into the camera
- Route the cable along the windshield headliner
- Tuck it behind the A-pillar trim
- Connect to the 12V cigarette lighter
Install Rear Camera
- Route the rear camera cable along the headliner
- Continue down the C-pillar to the trunk
- Pass the cable through the trunk rubber grommet
- Mount the rear camera above or beside the license plate
- Connect the cable to the front camera
Test System
- Start the vehicle
- Confirm automatic recording
- Verify both front and rear camera views
- Adjust camera angles if necessary
Finalize Installation
- Secure loose cables with clips or zip ties
- Leave slight cable slack near both cameras
- Reinstall trim panels
- Confirm all recordings are working properly
Before driving, test the camera angles and confirm that recordings are being saved properly.
Frequently Asked Questions
What is the difference between a 2-channel and 3-channel dash cam?+
Is a 3-channel dash cam worth it?+
Is a 2-channel dash cam enough for daily driving?+
Do Grab and taxi drivers need a cabin camera?+
Which is better, Occulli S1 or Occulli X1?+
Does a dash cam record while the car is parked?+
What microSD card should I use for a dash cam?+
Quick Summary: Which One Should You Choose?
There is no single best dash cam for every driver. The right choice depends on how you use your vehicle and the type of coverage you need.
Choose the Occulli S1 if:
- You drive a private vehicle
- You mainly commute or drive daily
- You want front and rear coverage
- You do not need interior recording
- You prefer a simpler 2-channel setup
Choose the Occulli X1 if:
- You drive for Grab or another ride-hailing service
- You operate a taxi or PUV
- You manage a fleet or company vehicle
- You frequently carry passengers
- You want front, rear, and cabin coverage
- You want additional driver-assistance features
For most private drivers, 2-channel coverage is the practical choice. For professional drivers and vehicles that regularly carry passengers, 3-channel coverage offers more complete visibility. The best dash cam is ultimately the one that matches how you actually use your vehicle.
Why Occulli? Built for the Way You Drive.
At Altitude, we believe technology should make everyday driving more convenient, practical, and secure.
Occulli dash cams are designed around real driving situations—from everyday commuting to professional passenger transport—giving drivers the coverage they need without adding unnecessary complexity.
Whether you choose the S1 for straightforward front-and-rear protection or the X1 for complete three-channel coverage, the goal is the same: drive with confidence and leave less to chance.
No Looking Back.


Share: